Create a quality issue
Log a defect or observation as a tracked quality issue using the three-step Create Issue wizard, capturing severity, category, affected quantity, production links, evidence, and an assignee.
A quality issue is Bulk's record of a defect, non-conformance, or quality observation found on the shop floor. Creating one starts the quality workflow: it captures what went wrong, how many units are affected, and who needs to act, then gives the problem a unique reference so you can review, disposition, and close it later. Create a quality issue whenever an operator, inspector, or supervisor spots something that needs to be tracked and resolved rather than fixed silently.
This guide covers the full-page Create Quality Issue wizard, the main way to log an issue by hand.
Permission required
You need the Create quality issues permission (quality_issues.create) to open and submit the wizard. The built-in Quality, Entity admin, and Super user roles include it. The default Operator and Manager roles do not, so if you cannot see the New Issue button, ask an administrator to grant a role that includes this permission.
Before you begin
- Confirm your role includes the create permission described above.
- Know the production context, if any: the job or work-order number, the affected part, and roughly how many units are impacted.
- Optionally, set up quality categories in advance so you can classify the issue. Categories are configured in settings and each one can carry a default severity. See Configure quality categories and root causes.
Open the Create Issue wizard
You can reach the wizard from several places:
- On the Quality home page, open the actions menu and choose New Issue.
- On the Quality Issues list page, select the New Issue button in the header. When the list is empty, the same action appears as Log Issue.
- Go directly to the
/quality/issues/newroute.
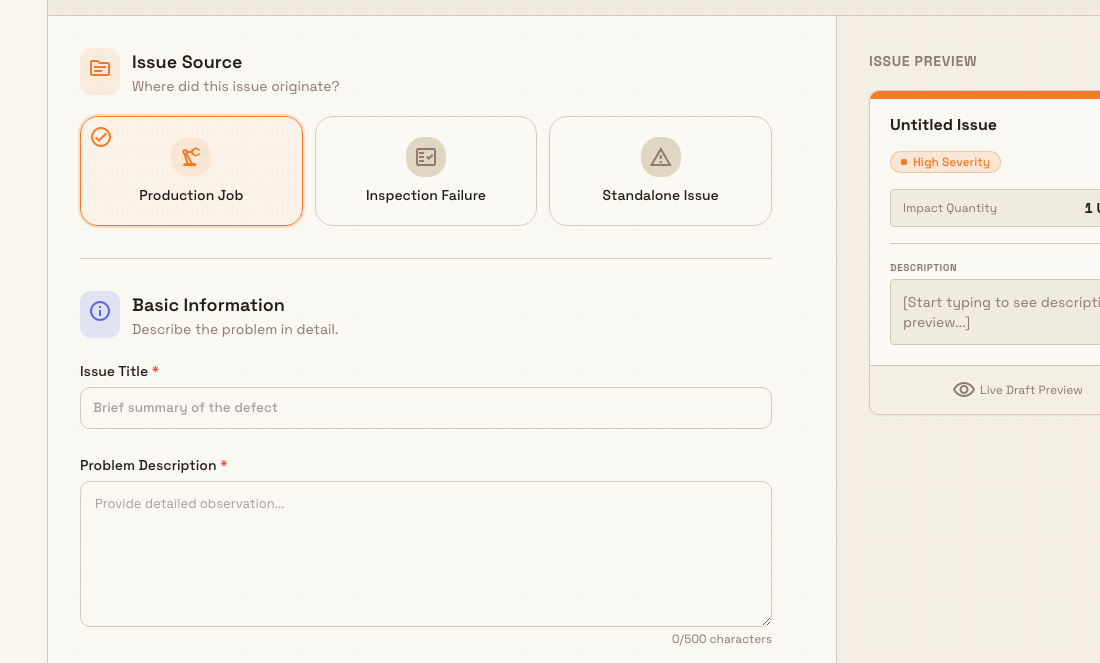
The wizard opens with a three-step indicator across the top — Source & Info, Classification, and Assignment & Review — and a live preview of the issue on the right that updates as you type.
quality.create-issue-01
Step 1 — Source & Info
Under Issue Source, pick where the issue originated:
- Production Job — an issue linked to a specific work order or batch.
- Inspection Failure — an issue generated from a failed quality-control checklist item.
- Standalone Issue — a general observation not linked to a specific job.
Under Basic Information, fill in:
- Issue Title (required) — a brief summary of the defect, up to 200 characters.
- Problem Description — a detailed observation, up to 500 characters, with a live character counter.
The Next Step button becomes active once you have selected a source and entered an issue title.
Step 2 — Classification
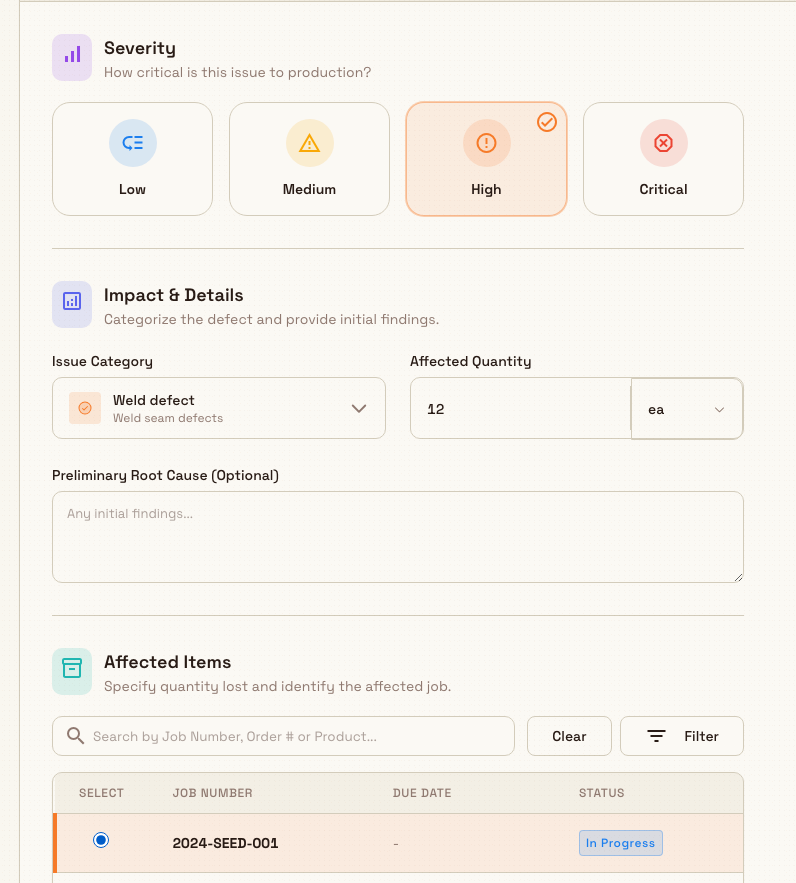
Severity is chosen from four cards — Low, Medium, High, and Critical — and defaults to High. Pick the level that reflects how critical the issue is to production.
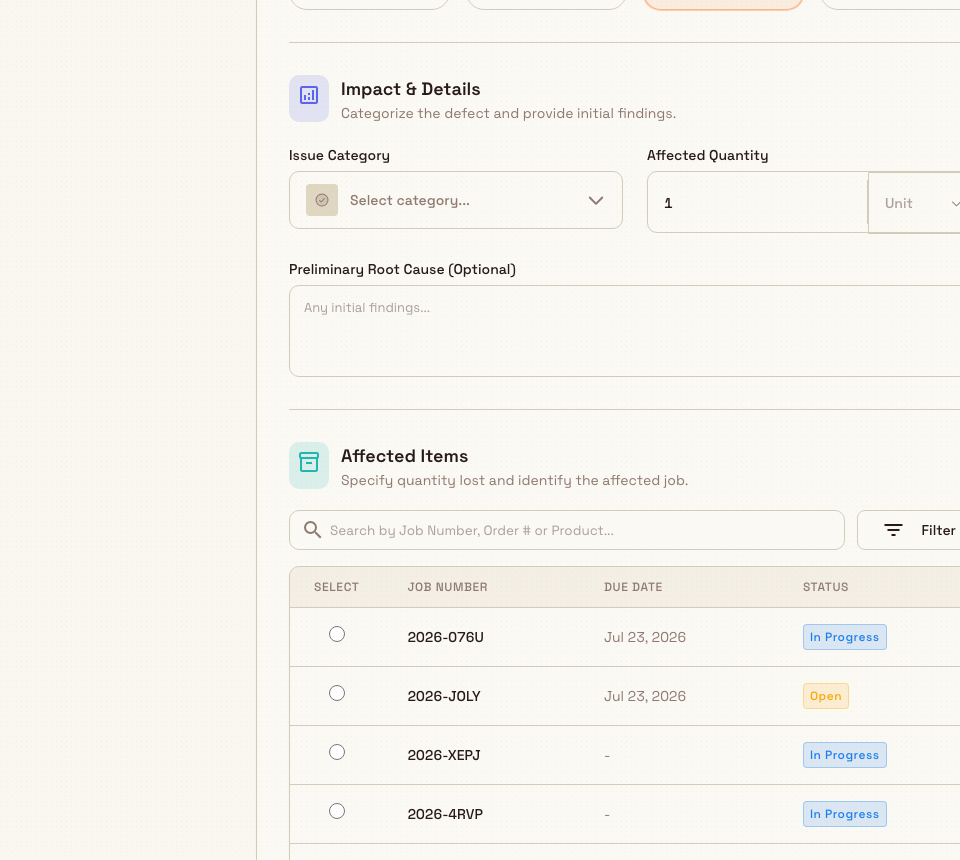
Under Impact & Details:
- Issue Category — select a category to classify the defect. Choosing a category automatically sets the severity to that category's default level, which you can still override.
- Affected Quantity — enter how many units are affected (at least 1) and pick the unit of measure from the adjacent selector.
- Preliminary Root Cause (Optional) — jot down any initial findings.
Under Affected Items, use the job selection table to search for and attach the affected production job. Selecting a job also links its part. You can proceed once the affected quantity is greater than zero.
quality.create-issue-02
Step 3 — Assignment & Review
Under Evidence, drag and drop or browse for photos and documents — up to 10 files, each up to 10 MB. Uploaded files appear in the preview count on the right.
Under Assignment, use the Assigned Inspector/Team selector to route the issue to the right person. You can search by name and clear the selection if needed.
Review the live preview on the right, then select Submit & Create Issue. The button shows Creating... while the issue is saved. If you decide not to continue, Cancel prompts a Discard changes? confirmation when you have unsaved edits.
quality.create-issue-03
What happens after you submit
When you submit, Bulk:
- Generates a unique issue number in the form
QI-YYYY-NNNN(for example,QI-2026-0001), numbered per calendar year. - Creates the issue with a status of Open and a disposition of Pending.
- Shows a confirmation message such as "Issue QI-2026-0001 created" and opens the new issue's detail page, where you can add comments, attach more evidence, set a root cause, and later disposition and close the issue.
From there the issue is ready for review. See Review and close a quality issue for the next stage.
Granite Peak Manufacturing example
At the Leeds Fabrication Plant, an inspector runs a first-off check on job JOB-4821, a batch of steel mounting brackets, and finds weld porosity on 12 of them. To get the batch tracked before it moves on, the inspector opens Quality Issues, selects New Issue, and works through the wizard:
- Step 1 — chooses Production Job, titles it "Weld porosity on mounting bracket batch", and describes the pin-holes seen along the fillet welds.
- Step 2 — sets severity to High, picks the Weld defect category, records an affected quantity of 12 units, and links job JOB-4821 in the Affected Items table.
- Step 3 — uploads two close-up photos of the porosity and assigns the issue to the welding team lead.
On submit, Bulk creates QI-2026-0001 as an Open issue with a Pending disposition and opens its detail page. The welding lead now has a tracked, evidence-backed record to investigate and disposition.
Feature state and limitations
This capability is generally available. Keep the following in mind, all confirmed against the current build:
- NCR escalation is a separate flow. The wizard creates a quality issue only. To raise a non-conformance report, use the dedicated Create an NCR flow.
- The Problem Description marker. The description field shows a required marker, but the wizard only requires a source and an issue title to move past step 1. You can advance without a description, though completing it is strongly recommended.
- The live preview needs a wide screen. The preview sidebar is shown on large screens; on narrow or mobile widths it is hidden, and you work through the steps without it.
Troubleshooting
- You cannot find the New Issue or Log Issue button. Your role is missing the
quality_issues.createpermission. Ask an administrator to assign the Quality, Entity admin, or Super user role. - The Next Step button stays disabled. On step 1, make sure a source is selected and the Issue Title is filled in. On step 2, make sure Affected Quantity is at least 1.
- The Issue Category list is empty. No quality categories have been configured yet. An administrator can add them under settings — see Configure quality categories and root causes.
Related guidance
Quality
Understand the Quality module in Bulk — where to find it, what it manages, and how quality issues, NCRs, CAPAs, holds, and 8D reports connect across production.
Review and close a quality issue
Review and close one quality issue from its detail page, or disposition and close a matching group from the Issues list.