Create an inbound document
Create an inbound document manually, reuse a saved document setup, add forms, and check the requirements before starting work.
Last updated
Use New Document when you need to enter a customer order by hand instead of importing it from a PDF. The page saves your work as a draft until you select Create document.
Before you start
You need permission to create and update inbound documents. You also need an active customer with a currency.
Your site can require at least one reference PDF before a document can be created. This rule is controlled in the entity operating settings.
Open or resume a draft
Open Inbound → New Document, or select New Document from the Inbound Documents page.
Bulk creates a draft when you have no unfinished drafts. If drafts already exist, choose whether to continue one, start another, or discard one. Changes save automatically: the status beside the document number changes from Syncing... to Saved to database.
Wait for the draft to save
Before applying or saving a template, wait until the status reads Saved to database. The template actions are unavailable while a change is still syncing.
Enter the document details
Select a Customer first. This sets the document currency and loads any customer-specific fields. You can then choose an Address and enter the PO number, customer reference, assigned contact, priority, required dates, and internal notes.
The Address field stays unavailable until a customer is selected. When the customer has a primary address, the field shows that address with a Default badge until you choose another one. In the list, that address is marked Primary. Open the list and select Add new address to add a customer address from this page. You need permission to edit customers. Without that permission, Add new address is not shown. In Add address, enter a label or a street address. You can also fill City, State / region, Postcode, and Country. The type starts as Delivery. Select Invoice or Business as well when they apply, or clear Delivery if it does not. Select Add address. Bulk saves the address on the customer, selects it on this draft, and confirms with Address added.
The received date and required date start with today's date. Complete any fields or custom dates marked as required. Line items are optional at this stage: add them now with Add from template, or add them after the document is created.
Under Reference PDFs, upload the customer's PO, drawing, or specification, or attach a PDF from the file library. When your site requires a PDF, the Create document button stays disabled until one is attached.
Reuse a document setup
Full-document templates can reuse more than line items. They can include selected document fields and document forms, selected line items and their chosen setup, and the document services referenced by those selected items.
To apply one:
- Wait for Saved to database, then select Apply template.
- Choose a template and review the fields and items it will add.
- If the draft already has items, choose Replace items or Append items.
- Select Apply template in the drawer.
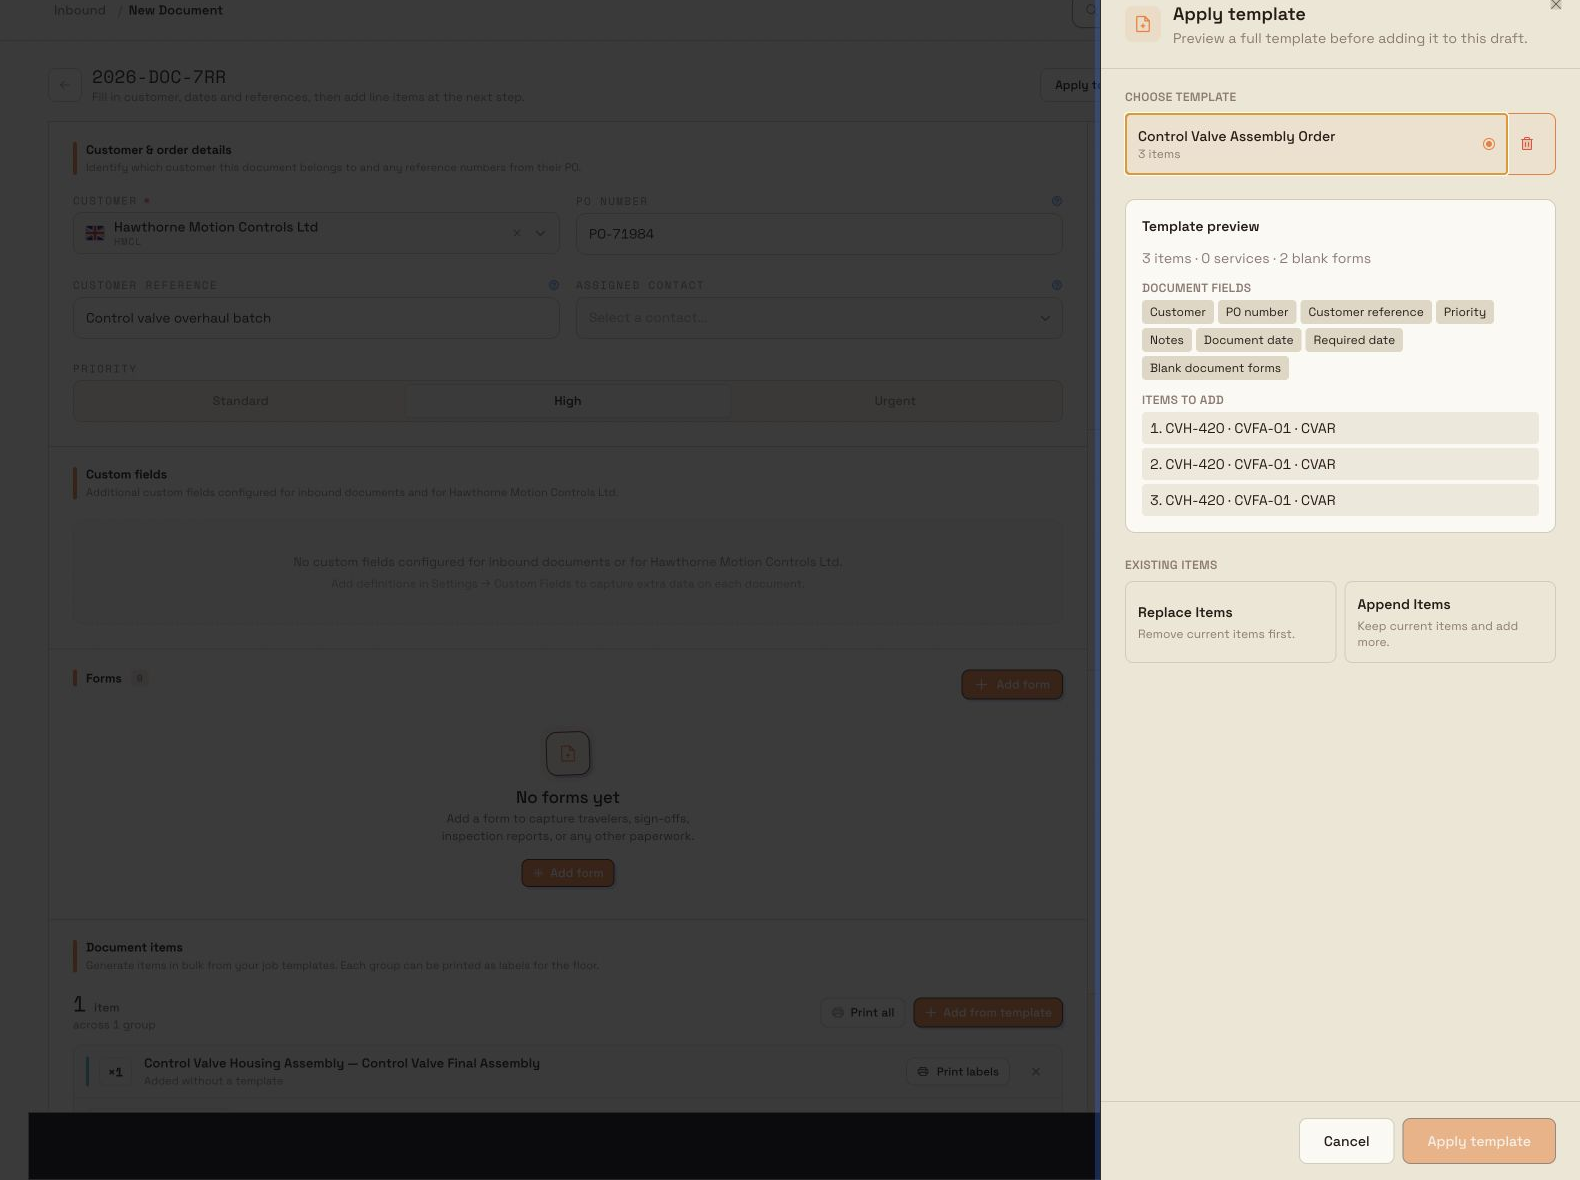
To create a reusable setup from the current draft, select Save as template, name it, and choose the document fields, items, and item setup to include.
Templates copy blank form assignments, but not completed answers. They also do not copy attachments, approvals, document history, or production jobs.
Applied templates move selected dates relative to the site's current date. The document date becomes today, while received, required, custom, and item-required dates keep their original day spacing from the source document date. Cloning a document is different: it copies the selected source dates exactly.
Add forms
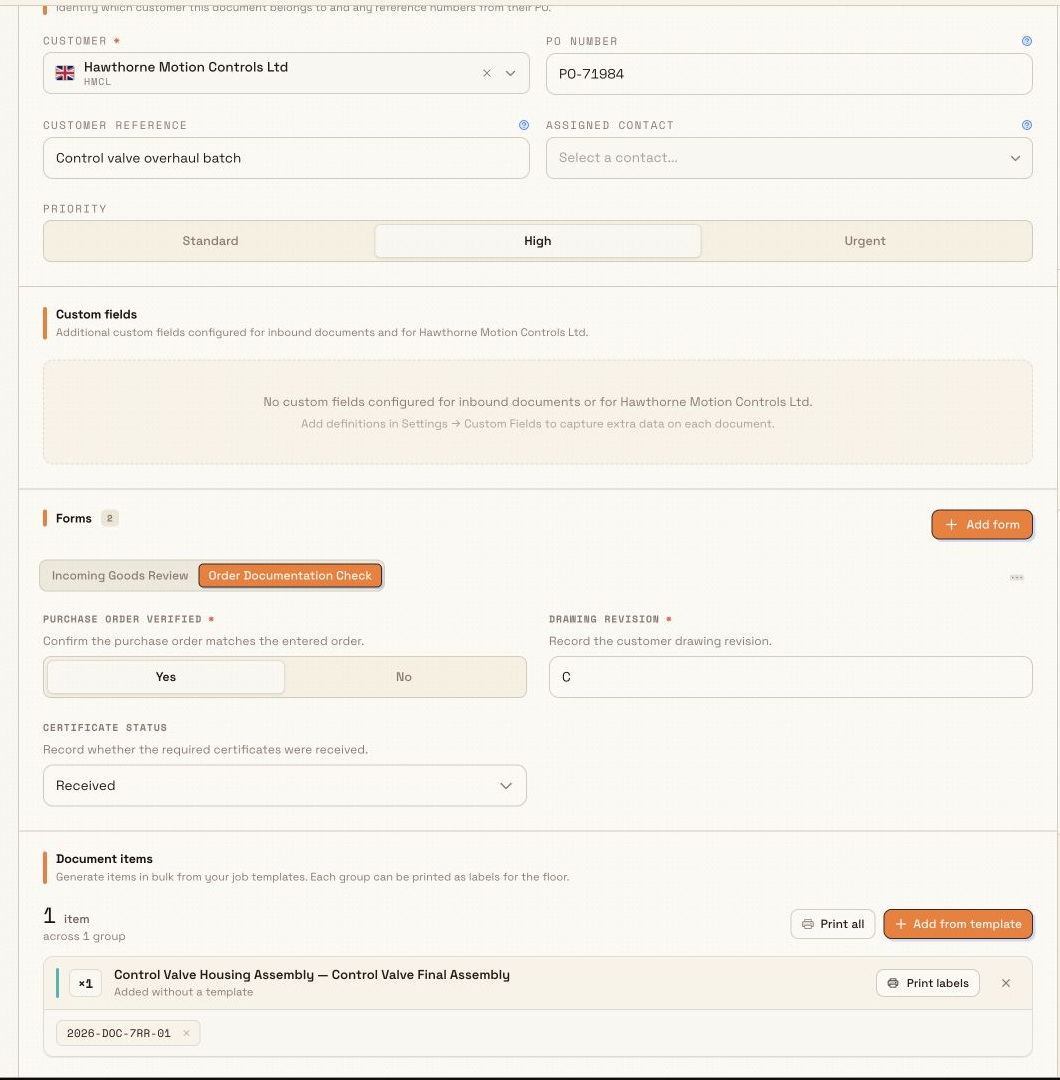
The Forms card sits inside the draft. Select Add form, find a form in the library, and choose it to add it to the document. Assigned forms appear as tabs and can be filled without leaving the page.
Answers save automatically. Every required field inside an attached form must be complete before the document can be created. The N required badge counts incomplete forms assigned as requirements. Forms added manually are optional assignments and do not gain that badge. When you select Create document, Bulk saves the latest form answers before checking the requirements.
Create the document
Select Create document after the draft has saved. Bulk checks that:
- a customer and currency are set;
- a reference PDF is attached when your site requires one;
- required fields and dates are complete; and
- required forms are complete.
If a requirement is missing, Bulk keeps the draft open and explains what needs attention. When the checks pass, the document opens on its detail page with the status In progress.
Troubleshooting
Template actions are disabled. Wait for Saved to database. Your role must also allow the template action.
No full-document templates are available. No compatible template is visible to you. A teammate can save a team template, or you can save the current draft as a template if your role allows it.
Append items is unavailable. Existing items tied to another customer cannot be kept. Choose Replace items, or use a compatible draft and template.
Create document is disabled. Hover over the button to see the reason. A PDF may be required, an upload or save may still be running, or settings may still be loading.
Creation fails with a missing-requirement message. Complete the named field, date, or required form, then try again.