Upload a file
Add PDFs, Office documents, and images into a folder in the Files area, with an editable name and description for each file.
The Files area is where your organization stores and shares documents and images — things like drawings, work instructions, supplier certificates, and photos. Uploading adds a file from your computer into a folder so anyone with access to that folder can find, preview, and reuse it elsewhere in Bulk.
This guide covers uploading one or more files into a folder you can manage.
Before you start
You need two things to upload:
- The "Manage Files" permission. In Bulk, a permission is the right to perform a specific action. Uploading requires Manage Files (
file_system.manage). By default this belongs to the Super user, Entity admin, and Manager roles. The Operator role has View Files only, so an operator can browse and open files but cannot upload. - Manage access to the target folder. You upload into a folder, and you must be able to manage that specific folder. If a folder is restricted (a "managed" folder), you need to be its owner or have been granted manage access to it.
If you have View Files but not Manage Files, the Upload button does not appear for that folder.
Open the Files area and choose a folder
- In the main navigation, select Files.
- Files always open inside a folder, so pick one first. Choose a folder from the folder list on the left. Until you do, the page shows Select a folder with the hint "Choose a folder from the sidebar to browse or upload files."
- Once a folder you can manage is open, the folder toolbar appears with an Upload button (next to New Folder, the view switch, and Search this folder…).

files.upload-01
Upload files
You can start an upload two ways:
- Click Upload. Select Upload in the folder toolbar to open the Upload Files dialog. (An empty folder shows the message "This folder is empty" with an Upload Files button that does the same thing.)
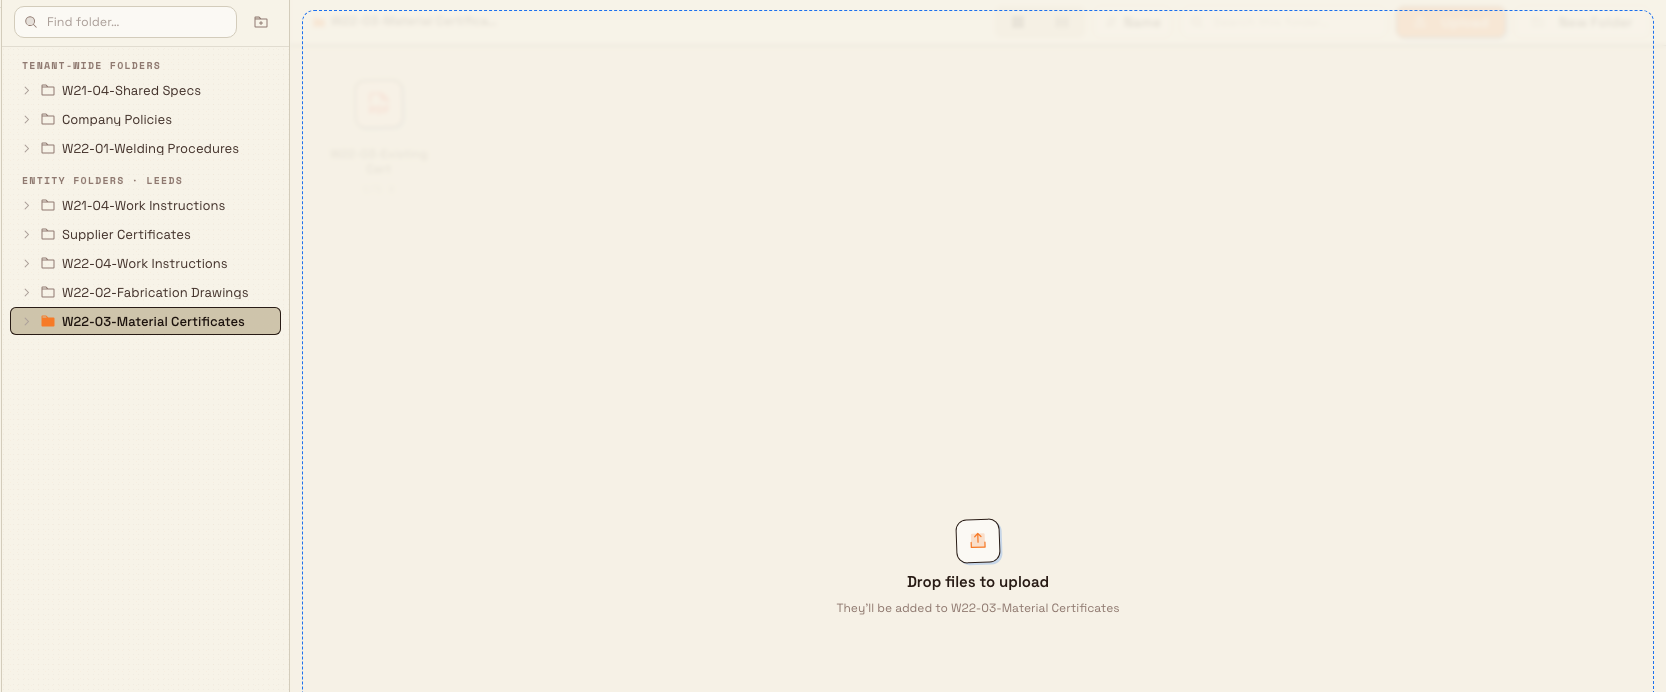
- Drag files from your computer. Drag one or more files from your desktop onto the folder's file area. A Drop files to upload overlay appears, naming the folder they will be added to; release to drop them straight into the upload dialog.
In the Upload Files dialog:
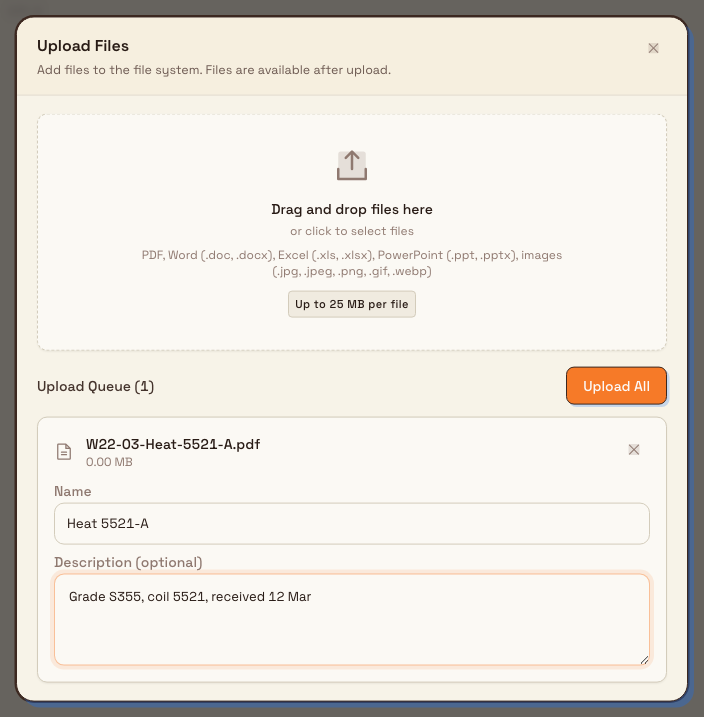
- Add files. Click the drop zone ("Drag and drop files here / or click to select files") and choose files, or drag them onto the dialog. You can add several at once.
- For each queued file, edit the Name and, optionally, the Description (optional). The name defaults to the filename without its extension; this is the display name the file will show in the Files list. Remove a file from the queue with the X on its card.
- Select Upload All. Each file shows a short progress indicator and then "Upload complete", and you see a "<name> uploaded" confirmation. Uploaded files appear in the folder right away.
files.upload-02
What you can upload
Bulk accepts PDF, Word (.doc, .docx), Excel (.xls, .xlsx), PowerPoint (.ppt, .pptx), and images (.jpg, .jpeg, .png, .gif, .webp), up to 25 MB per file. Anything else is rejected before it uploads.
files.upload-03
Example: mill certificates at Leeds Fabrication Plant
A steel delivery arrives at Granite Peak Manufacturing's Leeds Fabrication Plant, and each coil comes with a supplier mill certificate as a PDF. Dana, an admin, opens Files, selects the Material Certificates folder, and drags all four PDFs from the delivery email onto the folder. The Upload Files dialog opens with the four files queued.
For each one, Dana replaces the default filename with the steel's heat number (for example Heat 5521-A) in the Name field and adds a short Description such as "Grade S355, coil 5521, received 12 Mar." Selecting Upload All stores all four. They now sit in the Material Certificates folder where the quality team can preview them, and they can later be attached to the matching job or order.
Expected result
After a successful upload:
- Each file appears in the current folder, using the Name you set (or the filename without its extension).
- You see a "<name> uploaded" confirmation per file.
- The file is immediately available to open, preview, download, move, or attach elsewhere in Bulk.
- The storage summary at the bottom of the Files area updates to reflect the added files.
Limits and feature state
Uploading files is a generally available part of Bulk. Keep these limits in mind:
- Size: 25 MB per file. This is enforced both as you queue files and again on the server.
- File types: only the PDF, Office, and image types listed above are accepted.
- Storage quota: your organization has a total storage allowance set by its plan (some plans are capped, others are unlimited). The Files status bar shows how much you have used. If an upload would push you past the limit, it is blocked with a message showing your current usage against the cap.
Troubleshooting
- No Upload button. You are either not inside a folder yet (select one first — the page shows "Select a folder" until you do), or you have View Files but not Manage Files, or you lack manage access to that particular folder. Ask an admin for the Manage Files permission or access to the folder.
- "Invalid file" message when adding a file. The file is over 25 MB or is an unsupported type. The notification names the file and the reason ("File size exceeds 25MB limit…" or "File type not supported. Allowed: PDF, Office, or image files"). Compress or convert the file, or export it to an accepted format, then try again.
- Upload fails with a storage-limit message. Your organization has reached its plan's storage allowance. Delete files you no longer need, or ask an admin about your plan's limit.
- A file will not upload because the name is blank. Every file needs a non-empty Name. Type a name before selecting Upload All.
Related
- Browse files — find and open files across your folders.
- Organize files — create folders, move, and rename files.
- Preview a file — view a file without downloading it.
- Use files in another module — attach stored files to jobs, orders, and other records.
- Files — overview of the Files area.