Set a planning time window
Control which days and how much of the timeline the job planning board shows so you can plan and review production work across the right span of time.
Last updated
The job planning board in Scheduling lays out your machines as rows and time as a horizontal, scrollable axis. The planning time window is the span of days that axis currently shows. Setting the window means choosing which day the board starts on, how many days are in view, and how much detail each hour shows. You do this so you can focus on the stretch of production you are planning: today's shift, the rest of this week, or a run that spills into next week.
The window is a view control. It changes what you look at and how the board buckets each machine's capacity per day; it does not move, save, or change any planned work.
Before you start
To open the planning board and set a window, you need:
- The Scheduling module enabled for your tenant. Select Scheduling in the sidebar to open the planning board.
- The view planning permission (
scheduling.view). The Super user, Entity admin, Manager, Operator, and Tablet user roles all have it by default. Setting the time window only needs this view permission. - At least one machine set up to plan on. If no machines are configured, the board shows No machines to plan on with a link to Open asset settings. A teammate with master-data access adds machines in Settings → Assets and allows resources on their asset types before the board can show a timeline.
To also place, move, or resize work while you are in a window, you need the separate plan permission (scheduling.plan), held by the Super user, Entity admin, Manager, and Operator roles. The Tablet user role can view the board but cannot change planned work.
What the window looks like
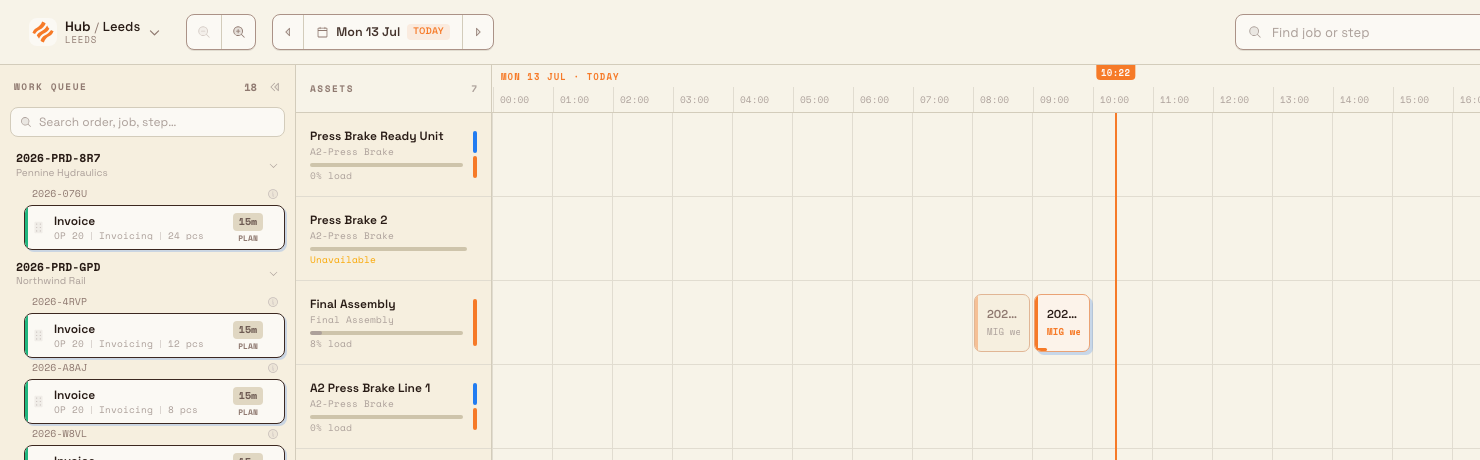
When you open Scheduling, the board creates a three-day window beginning at today’s local midnight and scrolls to the current time. Along the top, a multi-day ruler labels each day (for example, Mon 13 Jul) with clock-hour ticks beneath it. Today's column is marked Today, and a blue now line with the current clock time shows where you are in the day. Days that are longer or shorter because of daylight-saving changes simply render more or fewer hour ticks.
Set the window
All of the window controls live in the board header and the timeline itself.
- Move one day at a time. Use the Previous day and Next day carets on either side of the date chip to step the view backward or forward a day.
- Jump back to today. The Today button is enabled when you have moved away from today, with the hint Back to today. Select it to focus the current time. While the day navigator is on today, the button is disabled. The date label sits beside it.
- Widen the span. Scroll the timeline sideways to bring more days into view. Scrolling past the right edge adds days ahead; scrolling before the first day reveals earlier days. The board grows the window as you go, up to a maximum of 60 days. Loading additional days can briefly show a loading state and reset the zoom or work queue layout; reapply them after loading.
- Change the level of detail. Use Zoom in and Zoom out in the Timeline zoom group to step through progressively wider hour columns. Zooming in makes short jobs (for example, a 15-minute deburring step) easier to inspect and place; zooming out fits more of the window on screen. The widest zoom is three times the default column width.
The Find job or step button (keyboard shortcut /) opens search. Display settings controls which asset types and block details appear. There is no Auto-plan button in the current header.
The window bounds keyboard planning
When you plan a queued step from the keyboard instead of dragging it, the Plan queue step dialog offers Machine, Day, and Start time. Move planned run also lets you edit Duration. The Day dropdown lists only the days that are currently in your window. Widen the window first if the day you want to plan on is not yet listed.
Gotham example
You are planning work for Wayne Corp at Gotham Applied Sciences on Sunday evening.
- Open Scheduling. The three-day window begins today and focuses on the current time.
- Review the Assembly planning slot on Gotham Fit Bench, then move forward to Monday and Tuesday to inspect next week's work.
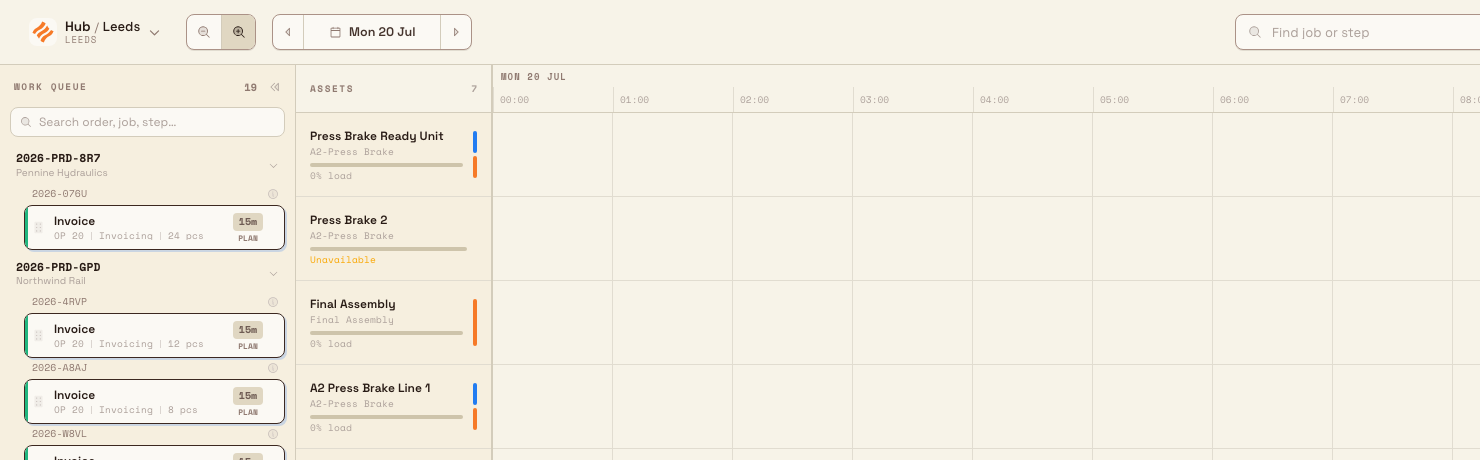
- Select Zoom in to widen the hour columns. Scroll sideways to review the boundary between days.
- Select Today to return to the current time.
Navigating and zooming do not change a planned run. These controls only change the view.
Expected result
After you set a window, the ruler and the machine timelines redraw to the days you chose, the per-day capacity load on each machine reflects those days, and any planned runs that fall inside the window appear in place. Moving day by day, jumping back to today, growing the span, and zooming all take effect immediately; there is no separate save step, because the window is a view, not saved data.
Feature state and limitations
The time window has these boundaries:
- The window is not saved. When you reload or reopen the board, it returns to today with a three-day view. Your chosen span, position, and zoom are not remembered between visits.
- There is no explicit date-range or day-count picker. You set the window through day navigation, sideways scrolling, and zoom: not by typing a start and end date or picking a number of days.
- The span is capped at 60 days. The board never grows the window past 60 days in total.
- Midnight rollover. If you leave the board pinned to today, it follows to the new day when midnight passes. If you have moved the view into the past, it leaves your window where you put it.
Troubleshooting
- The board says "No machines to plan on." The window has nothing to draw because no machines are configured. Select Open asset settings, then add machines in Settings → Assets and allow resources on their asset types. The timeline appears once at least one machine can be planned on.
- The board went back to today after a refresh. This is expected: the window is not saved. Scroll or navigate to return to the days you were working on.
- You can see the window but cannot place or move work. Viewing needs
scheduling.view; changing planned work needsscheduling.plan. If you only have view access (for example, the Tablet user role), ask an administrator to grant the plan permission.
Related guidance
- Scheduling and Prioritisation are different screens, so use Prioritise work on the board when you want to rank which step a machine runs next instead of setting the days on this timeline.
- Use the planning board: the full board layout, work queue, and drag-and-drop planning.
- Place or move a job: put a queued step onto a machine at a specific day and time within your window.
- Review capacity and resource context: read the per-day machine load that follows the days in your window.
- Hand planned work to production: move planned runs into live production.
- Scheduling: overview of the scheduling module.
Place or move a job
Put an unplanned job step onto a machine at a chosen time, and move or reschedule placed work, on the Scheduling planning board.
Review capacity and resource context
Read the planning board's asset column and Display controls to see each machine's daily load, live status, and compatible work centres.