Attach audit evidence
Attach photo evidence to audit items while an audit is in progress, satisfy required-photo checks, and view the saved photos in the completed report.
An audit in Bulk is a structured inspection that a person works through as a checklist of items (individual checks or questions). While an audit is running, you can attach evidence to an item: a photo that proves what you saw on the shop floor. This turns a pass, a fail, or a written note into a documented record that anyone reviewing the audit later can open and inspect.
Attach evidence when a photo makes the result defensible: a leaking fitting behind a "Fail", a missing guard behind a "No", a completed 5S zone, or the serial-number plate a check asks you to capture. Photos are stored with the audit and appear alongside the item in the finished report.
When you would attach evidence
You attach evidence during a running audit, from the audit screen, on the item you are answering. There are three situations where the photo control appears:
- Photo items. A Photo item exists purely to collect one or more pictures. Its upload area is always shown.
- Failed Pass/Fail items. When you mark a Pass/Fail item as
Failand the item was set up to require a photo, an upload area appears under the check. - "No" answers on Yes/No items. When you answer
Noon a Yes/No item that was set up to require evidence, the same upload area appears.
For items that only sometimes require a photo, the requirement is defined on the audit template, not chosen at run time. See the note under When a photo is required below.
Before you start
- Permission. Attaching and removing evidence needs the
audits.executepermission. In the default roles this is held by Super user, Entity admin, Operator, Manager, and Tablet user. If you can open and answer an audit, you can attach evidence to it. - An in-progress audit. Evidence can only be added while the audit's status is in progress — that is, after you have started it and before you submit it. Completed and cancelled audits are locked; the upload control and delete buttons stop working once the audit is submitted.
- A file that fits the rules. The control accepts image files only — JPG, PNG, GIF, or WebP — up to 10 MB each. On a phone or tablet it can open the rear camera so you photograph the item directly.
To reach a running audit, start one from the audits area first. See Start an audit.
Attach a photo to an item
- Open the audit you are running and go to the item that needs a photo.
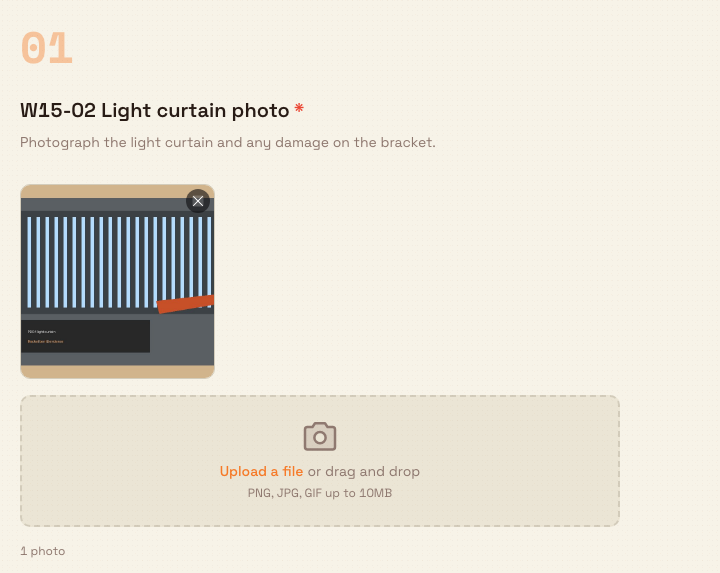
- Find the upload area under the check. It shows a camera icon with Upload a file, or drag and drop, and the hint PNG, JPG, GIF up to 10MB.
- Add the photo one of these ways:
- Select Upload a file and pick an image from your device.
- Drag an image file onto the upload area and drop it.
- On a phone or tablet, use the upload area to open the camera and take the picture.
- Wait for the upload to finish. A spinner shows on the upload area while the file transfers; when it completes, a thumbnail appears in the grid above the upload area.
- Repeat to add more photos if the item allows or requires several. A count hint under the grid tells you how many you have and how many are expected, for example
At least 2 photos requiredorUp to 3 photos.
audits.attach-evidence-01
Each thumbnail has a small remove control (an X in its corner). Select it to delete that photo.
Deleting evidence is permanent
Removing a photo deletes the file from storage immediately — there is no undo and no trash. Only delete a photo if you are sure you attached the wrong one. You can only delete evidence while the audit is still in progress.
When a photo is required
Some checks cannot be completed without a photo. This requirement is configured on the audit template, and shows up in two forms while you audit:
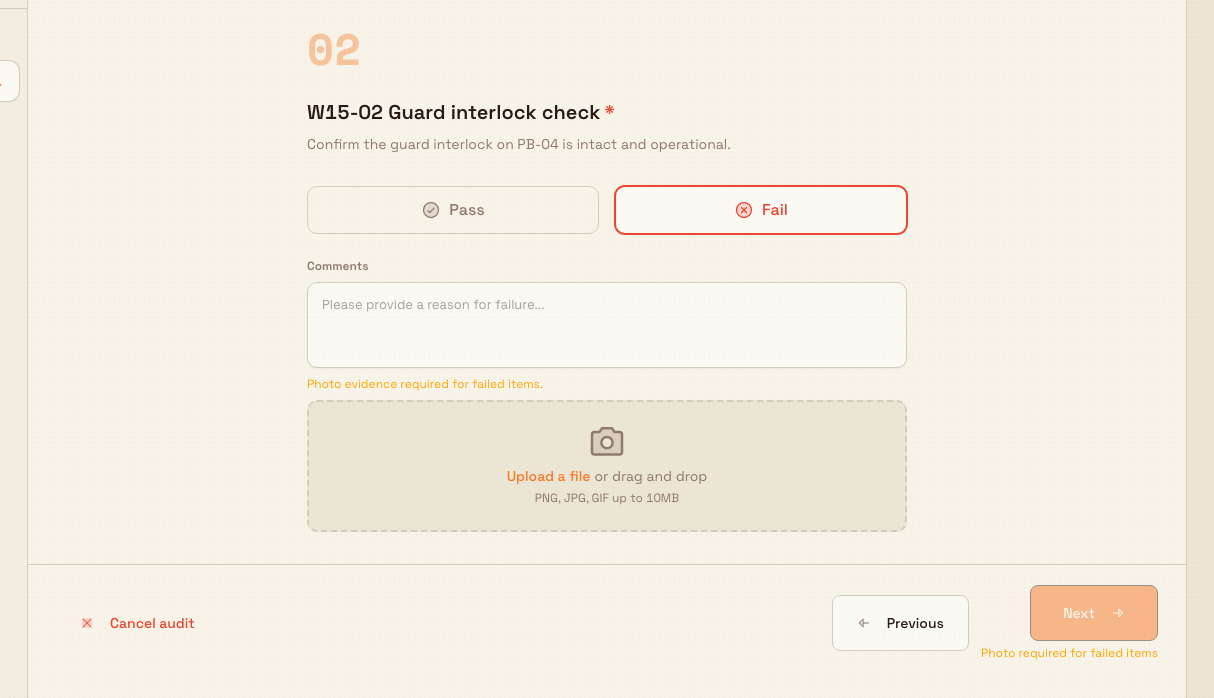
- On a Pass/Fail item set with Require Photo on Fail, marking the item
Failreveals the warningPhoto evidence required for failed items.and the upload area. - On a Yes/No item set with Require Evidence on 'No', answering
Noreveals the warningPhoto evidence required for "No" items.and the upload area.
Until you attach the photo, Bulk blocks you from moving on. The Next button on that item is disabled and shows a reason such as Photo required for failed items, Comment required for failed items, or Comment and photo required for failed items when both a note and a photo are outstanding.
The same rule is enforced again when you submit. If any required photo is still missing, submission is refused and a message lists the offending checks, for example Missing required items: Guard interlock check (photo required for fail). Add the missing photos, then submit again.
Requirements come from the template
Whether an item forces a photo is decided when the template is built, using the Require Photo on Fail and Require Evidence on 'No' switches. You cannot turn a requirement on or off from the audit screen. To change what is mandatory, edit the template — see Build an audit template.
audits.attach-evidence-02
Granite Peak Manufacturing example
Priya, a line operator at Granite Peak Manufacturing's Leeds Fabrication Plant, runs the daily pre-use safety audit on press brake PB-04. One item asks whether the light curtain is intact. She answers No — a bracket is bent. Because the template marks this Yes/No item with Require Evidence on 'No', Bulk shows Photo evidence required for "No" items. and will not let her advance.
Priya taps the upload area on her tablet, photographs the bent bracket with the rear camera, and waits for the thumbnail to appear. She adds a short note in the comment box as well, then continues. At the end she submits with no missing-item warning. When the shift supervisor opens the completed report an hour later, the bent-bracket photo is attached to that check, so the maintenance request that follows has visual proof of exactly what was wrong.
Expected result
Once a photo finishes uploading:
- The thumbnail appears in the item's photo grid, and the photo is saved to the audit.
- The photo counts toward any minimum or maximum the item defines, and toward any required-evidence rule, so the item stops blocking navigation and submission.
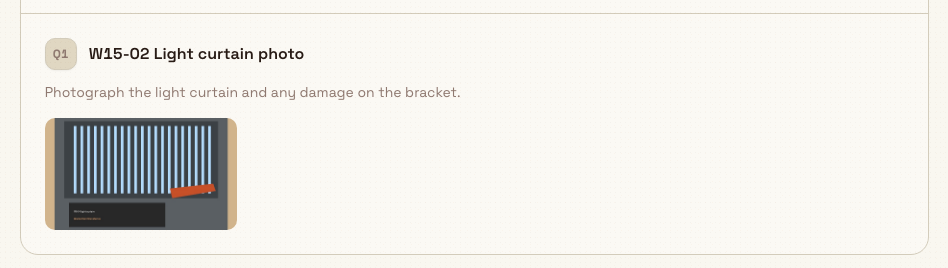
- After you submit the audit, the photo appears next to its item in the completed audit report, where reviewers can open it at full size. See Review audit results.
audits.attach-evidence-03
Limitations and feature state
This capability is generally available.
- Photos only. The evidence control on the audit screen captures images (JPG, PNG, GIF, WebP) up to 10 MB each. The underlying record also recognises signature and document evidence types, but those are produced by other item types (for example a dedicated Signature item), not by this photo upload area.
- In-progress audits only. You can add or remove evidence only while the audit is in progress. Attempting to change evidence on a submitted audit is rejected with an error explaining that only in-progress audits can be modified. To correct evidence after submission, an authorised user must reopen or re-run the audit; see Complete an audit response.
- Requirements are template-driven. You cannot make a photo mandatory or optional from the audit screen; that is set on the template.
Troubleshooting
- The Next button is greyed out. The item requires a photo (or a comment, or both) that you have not provided yet. Read the reason shown on the button —
Photo required for failed items,Comment required for failed items, orComment and photo required for failed items— and supply what is missing. - Submission is refused with a list of items. One or more required photos are still missing. The message names each check, such as
... (photo required for fail). Return to those items, attach the photos, and submit again. - The file is rejected. The upload area accepts images only, up to 10 MB. If you see a message about file type or size, convert the file to JPG, PNG, GIF, or WebP, or reduce it below 10 MB, then try again. Empty (zero-byte) files are also rejected.
- The upload area is gone, or delete does nothing. The audit is no longer in progress. Evidence is locked once an audit is submitted or cancelled.
Related guidance
Complete an audit response
Work through an in-progress audit in Bulk: answer each checklist item, meet comment and photo requirements on failures, and submit to record a Pass, Fail, or Pass with Issues result.
Override an audit response
Let a supervisor clear the production block created by an incomplete, overdue, or failed compulsory audit — for a fixed time, with a signed and logged reason.