Scan and process an inbound item
Scan one inbound item at a station, confirm its fields step by step, then mark it ready, create a production job, and print its label without leaving the screen.
What Scan & Process does
Scan & Process is a full-screen station for finishing one inbound item at a time. An inbound item is a single line on an inbound document — a purchase order or work order that entered Bulk as an uploaded file or manual entry. Instead of opening the document and editing a grid of lines, you scan the label on one physical item and Bulk walks you through just that item's fields, then turns it into production work.
The flow runs end to end on a single screen:
- Scan the item's label (or type its ID).
- Answer each of the item's fields, one at a time.
- Mark the item ready and create a production job — the unit of work the shop floor builds against.
- Print the item's label.
Use Scan & Process at a receiving desk or on the shop floor when you have a barcode scanner and want to process items individually as they arrive, rather than reviewing a whole document at once.
Processing a whole document instead?
To review and release many lines together, open the document and use the inbound grid. See Work with the inbound grid. Scan & Process is the one-item-at-a-time alternative.
inbound.scan-item-01
Before you start
You need three permissions to run the whole flow. The built-in Operator role grants all three, as do Entity admin and Super user:
- View inbound documents (
inbound_documents.view) — to look up the scanned item. - Edit inbound items (
inbound_items.update) — to save your answers as you advance. - Create production jobs (
production_jobs.create) — to create the job at the end.
A few other conditions must hold:
- The item already exists on an inbound document. Scan & Process finds existing items; it does not create new ones. If you are keying items in by hand first, see Create an inbound document.
- The item's document is in a status that allows single-item job creation: draft, in progress, approved, or in production.
- To print a label at the end, your site needs a published item label template. Without one, the print dialog will tell you to add and publish a template first.
Step 1 — Scan the item label
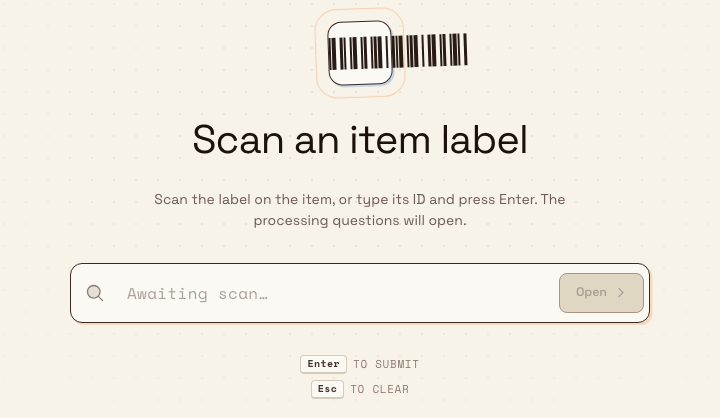
Open Inbound → Scan & Process from the sidebar. The station fills the screen with its own header and no sidebar, so nothing competes with the scan field.
On the scan screen (Scan an item label), do one of the following:
- Scan the label on the item with a hardware scanner, or
- Type the item's ID into the field and press Enter (or select Open).
While Bulk resolves the label, the button reads Looking…. If the label matches no item, an error appears — for example, No item matches "GP-000123". — and the field clears so you can try again. Press Esc at any time to clear what you have typed.
When a match is found, the station opens that item's questions automatically.
Step 2 — Answer each field
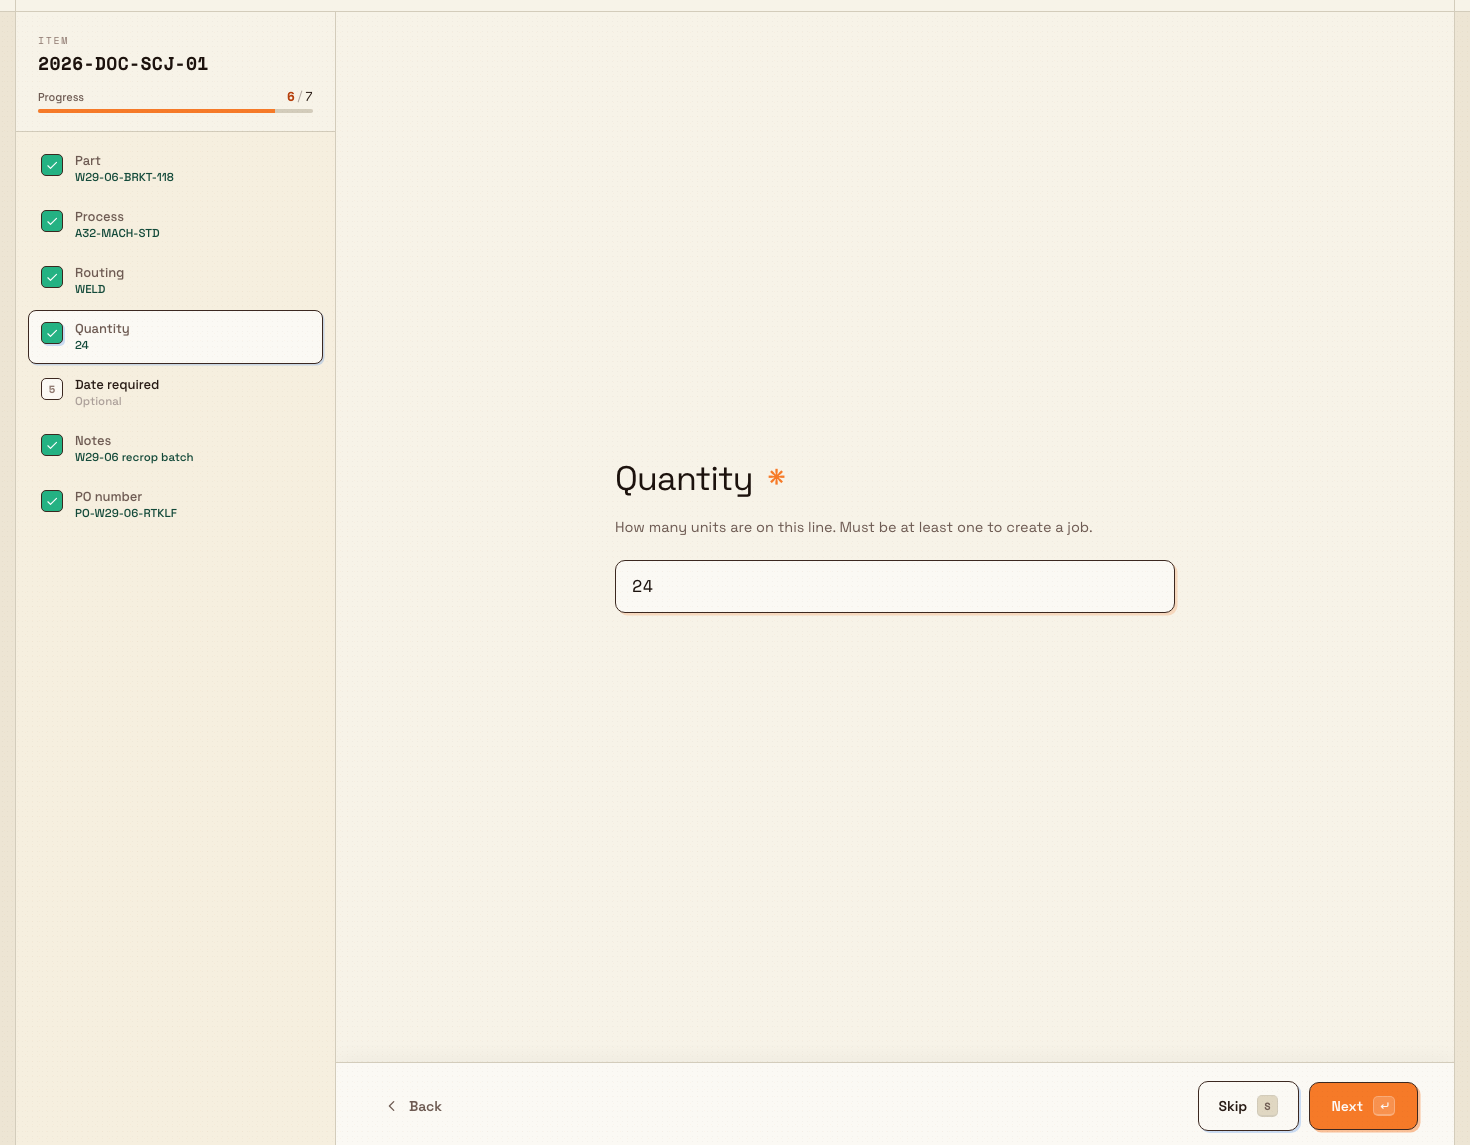
Bulk presents the item's fields as a sequence of questions, one per screen. A progress rail on the left lists every question, shows how many are filled out of the total, and lets you jump straight to any of them.
The core fields come first, in this order:
- Part (required) — the part this item will be made as. Search by part number or name.
- Process (required) — the manufacturing process for the item. Only approved processes can create a job.
- Routing (required) — the process type that governs how the item moves through production.
- Quantity (required) — how many units are on the line. Must be at least one.
- Date required (optional) — when the finished item is needed. Leave it blank if no due date applies.
- Notes (optional) — anything the shop floor should know before work begins.
Any custom fields configured for the item then follow. Each is marked Required or Optional, and conditional fields only appear once earlier answers make them relevant.
Move through the questions with the footer buttons — Back, Skip, and Next (Finish on the last question). You can also use the keyboard: Enter or the right arrow advances, the left arrow goes back, S skips, and Cmd/Ctrl + Enter advances from inside a field. Each answer is saved as you move on, so a required field with no answer keeps the Next button disabled until you fill it.
inbound.scan-item-02
Step 3 — Mark the item ready and create the job
After the last question, the station shows a summary for the item.
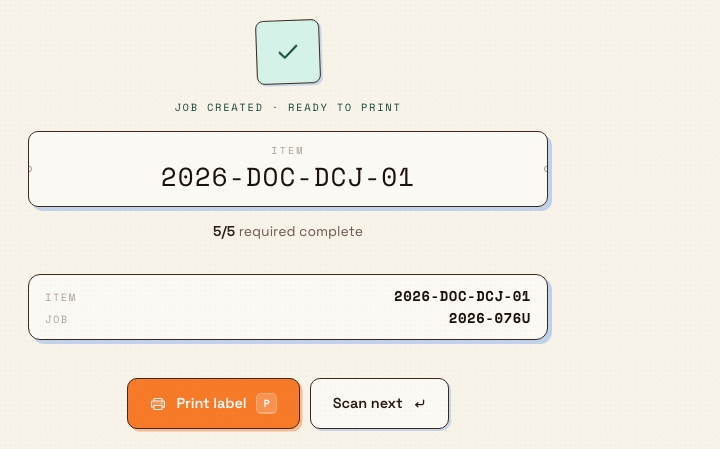
- If every required question is answered, the summary reads All required questions answered and offers a Mark ready & create job button. Selecting it marks the item ready and creates the production job. A confirmation appears — for example,
Job JOB-004821 created— and the summary switches to show both the item number and the new job number. - If a required answer is still missing, the summary reads Cannot create job · resolve required questions and lists each missing field. Select any listed field to jump back to it. The create button stays disabled until nothing is missing.
Creating a job is a forward step
Once a production job is created for an item, you cannot un-create it from this station. Confirm the part, quantity, and routing before you select Mark ready & create job.
inbound.scan-item-03
Step 4 — Print the label
With the job created, select Print label to open the Print Labels dialog. Choose a published item label template and generate the label PDF. When you are done, select Scan next to reset the station for the following item.
A Granite Peak example
At Granite Peak Manufacturing's Leeds Fabrication Plant, a receiving operator works through a pallet of bracket blanks booked in against a customer purchase order. Each blank carries a printed item label.
The operator scans the first label. Bulk opens the item and the operator confirms each field: Part GP-BRKT-118, Process CNC Mill, Routing Standard Mill Route, and Quantity 24. They set Date required to the promised ship date and skip Notes. With every required question answered, the summary reports All required questions answered, so the operator selects Mark ready & create job. Bulk confirms Job JOB-004821 created, the operator prints the label, hangs it on the bin, and selects Scan next for the following blank. The whole item takes well under a minute, and the pallet clears one scan at a time.
Expected result
For each item you process, the item's status moves from pending to ready to job created, a production job now exists for it on the shop floor, and — if you printed one — the item carries a fresh label. The document the item belongs to is unchanged apart from that item's progression.
Feature state and limits
Scan & Process is available and reached from Inbound → Scan & Process. Keep these limits in mind:
- One item per pass. The station processes a single item end to end. To release many lines together, use the inbound grid instead.
- The item must already exist. The station looks items up by label; it never creates them.
- Printing needs a template. The final print step depends on a published item label template for your site.
- The customer's operational status can stop job creation. If a customer is set up to warn or block new production work, the summary shows that message and — when the status blocks — keeps the create button disabled.
Troubleshooting
No item matches "…"— The scanned or typed ID does not resolve to an item at your current site. Check for a mistyped ID, confirm the item still exists on its document, and make sure you are working in the right site (entity). Deleted lines never match.- The create button is disabled and the summary lists missing questions — Answer every field under Cannot create job · resolve required questions. Select each listed field to jump back to it.
- A warning about the customer appears on the summary — The customer's operational status is set to warn or block new production jobs. If it blocks, job creation is refused until the customer's status is changed in settings.
- You scanned an item that already has a job — Re-scanning a processed item opens it read-only and shows its existing job number, so you can reprint the label rather than create a duplicate job.
- The print dialog says to add and publish a template — No item label template is published for your site. Add and publish one, then reopen the print step.
Related guidance
Review an inbound import
Open an upload session from Import History to confirm every uploaded file was read correctly, retry anything that failed, and jump to the inbound documents and production orders it created.
Work with the inbound grid
Use the inbound grid — a spreadsheet-style layout of an inbound document — to edit, fill, and mark ready many line items at once before submitting them to production.